|
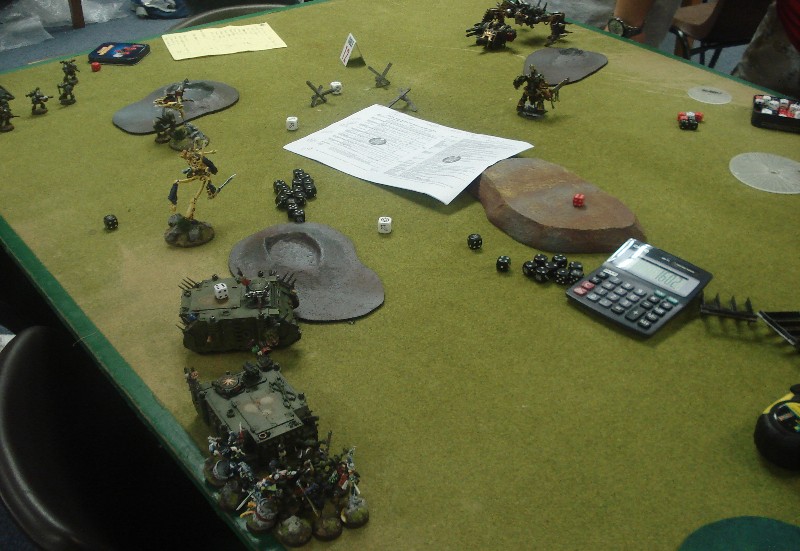
Eldar vs. Imperial BFG
A great way to start off my
month's gaming was a game against Chai, who was playing eldar last
game. I was on the other side of the table from Chai, and
didn't really get much of a feel, except that Chai was battering the
chaos fleet alongside me.
This was my first time
against an Eldar fleet, and I was well-aware of their reputation for
being fast (they can move both in movement and ordinance phases),
hard hitting (pulse lasers potentially causing 3 hits each), but
fragile.
We agreed on 1400 each side,
which happened to be all the ships I had.
Imperial: Fleet
Admiral with 1 extra re-roll; Retribution Class Battleship;
Vengeance Class Grand Cruiser; Mars Battlecruiser; 2 x Dauntless
(one with lances one with torps); Enforcer; 5 Sword class escorts.
Eldar: Void stalker
battleship; shadow cruiser; eclipse cruiser; 10 mixed Hemlocks and
Nightshade escorts
I rolled leadership for my
fleet, and got a handful of 8s and 7s, with my Mars cruiser coming
in at a disastrous 6. After a quick inspection tour aboard his
Aquilla Lander, my Fleet Admiral was shocked by the shoddy state of
the Mars battlecruiser, had the captain arrested, ordered his staff
to reassign themselves to the bridge of the Mars and took firm
command of the ship.
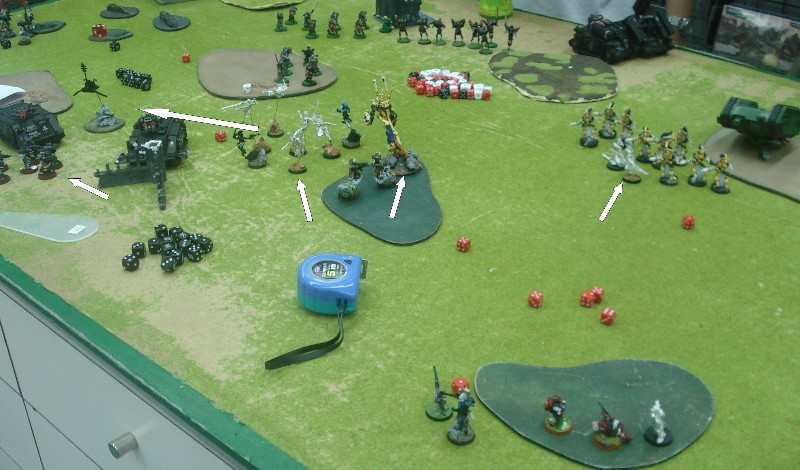
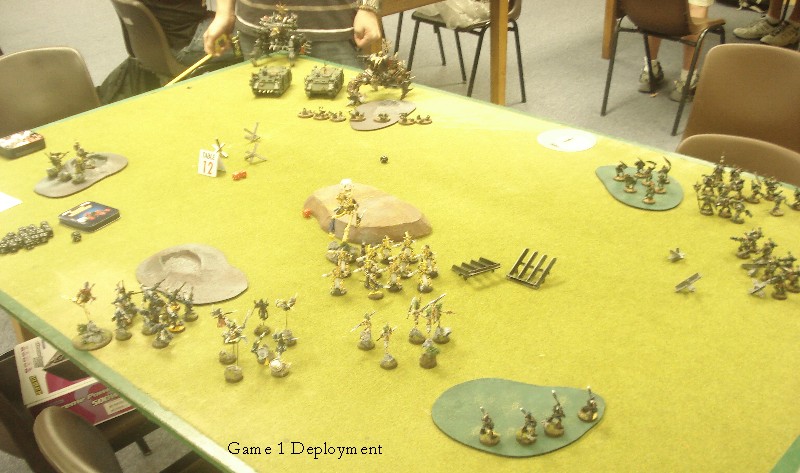
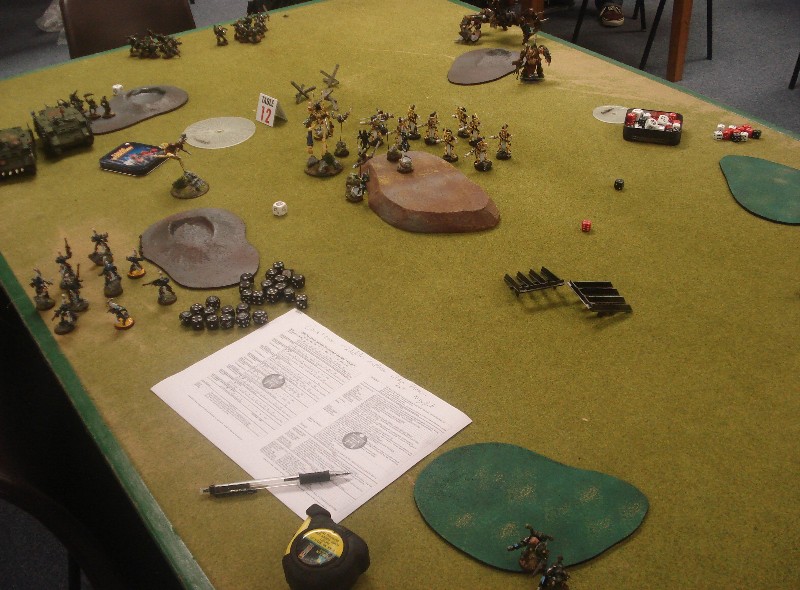
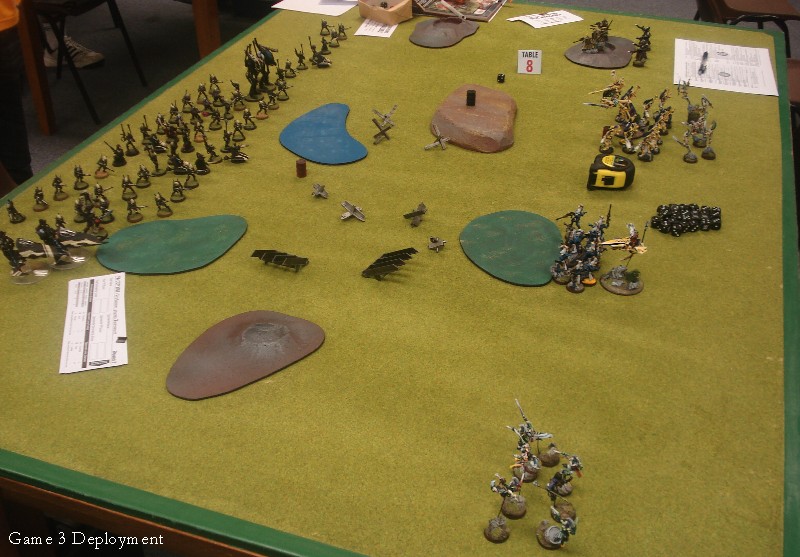
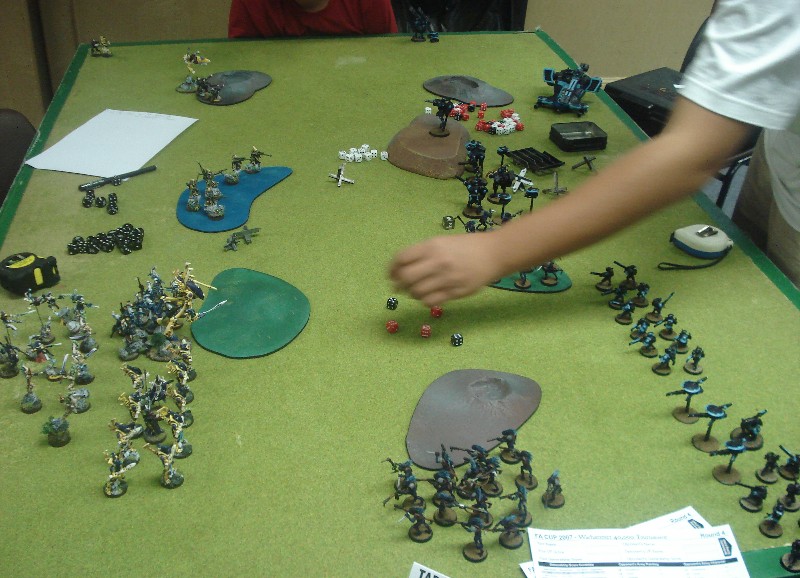
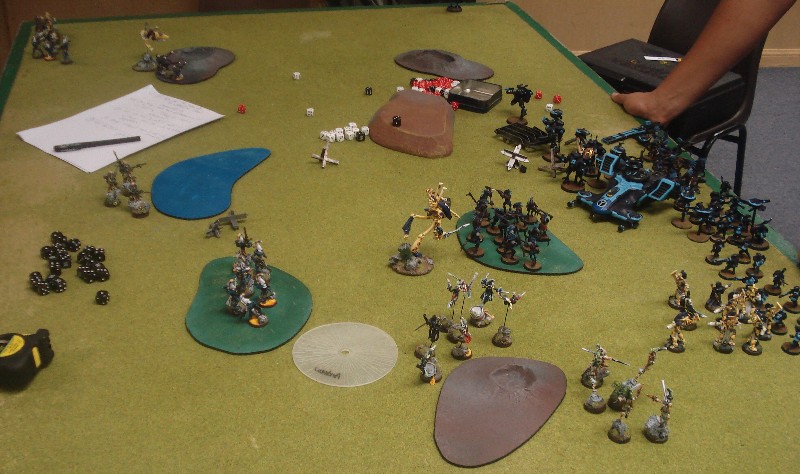
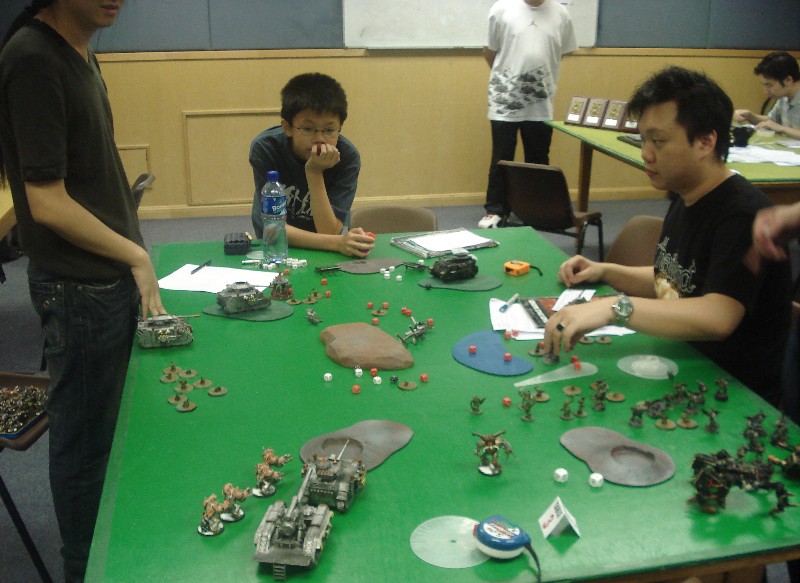
The Game
Chai set down each of his
escorts as single squadrons, meaning my fleet would be long deployed
before he started to put down his battleship and cruiser. I
was aware how easily my fleet would be out-manoeuvred, and I had
also seen Chai deploy along the table edge in the previous game, and
guessed he would do something similar.
My plan was to split my
force into three squadrons, with the fast and manoeuvrable escorts
and light cruisers on either wing, while the Retribution, Vengeance
and Mars tried to dominate the centre, and keep the eldar within
their 60cm range batteries. The Mars would hang back and
bombard the eldar, hoping Chai would fail his 2+ holofield saves
while the other two heavies would try and keep the eldar in range.
Hopefully I could keep the eldar in range of my centre while the
wings could rapidly redeploy to cover any threat.
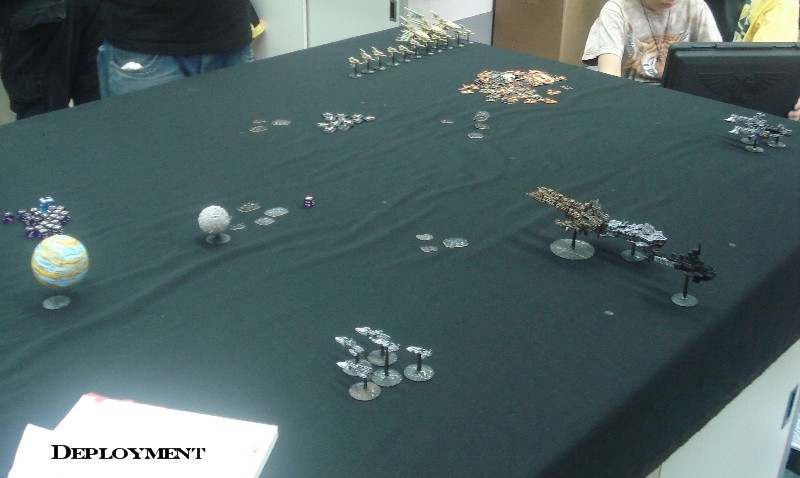
Chai deployed pretty much as
I had expected, although I was surprised he didn't split his forces
more, just putting a pair of escorts on my left, while most of his
fleet hugged the table edge on my right.
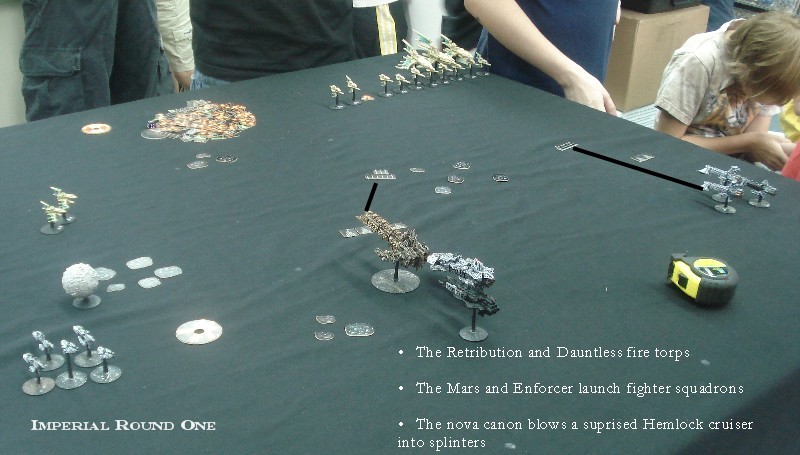
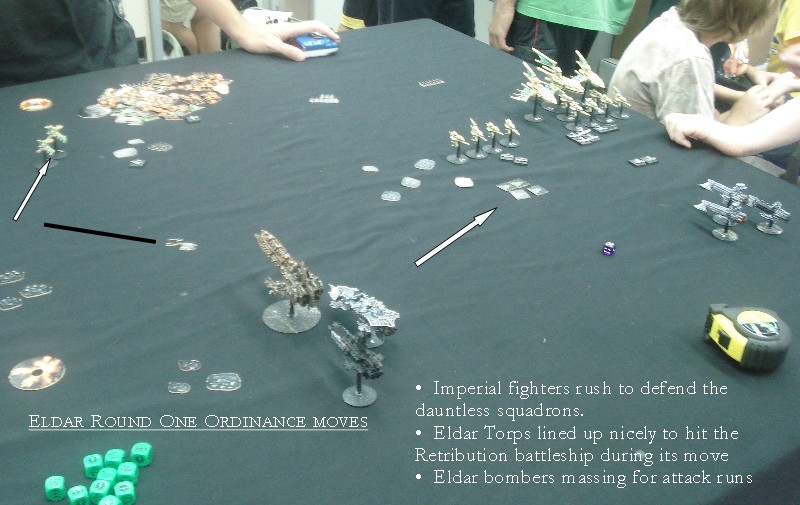
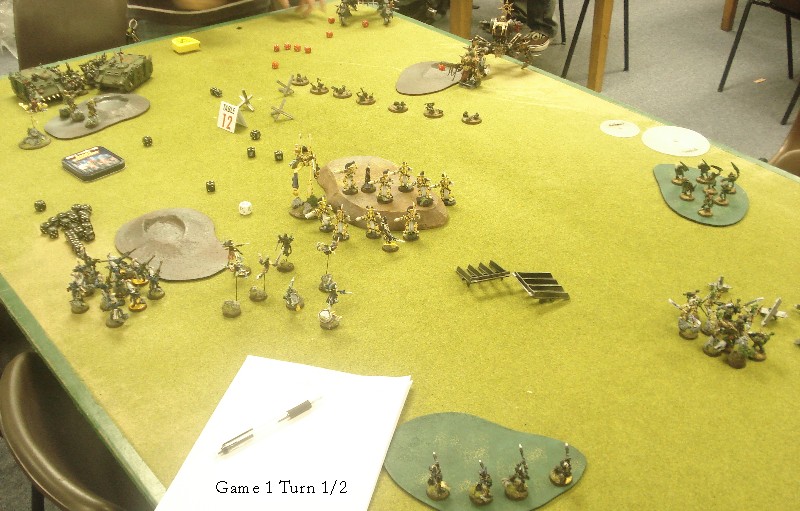
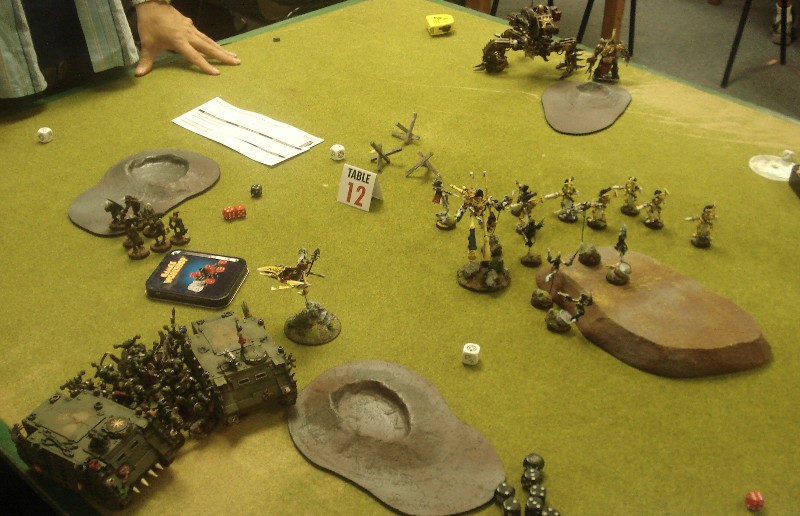
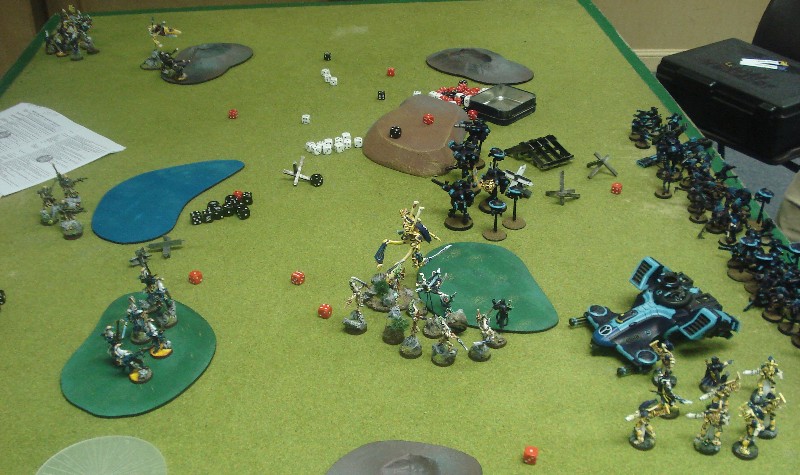
Round One
I got to go first, which
seems a disadvantage in most games. I was aware that eldar had
a 2+ save against torpedoes, and didn't have much hope of getting
close enough for an effective salvo, and so shot my torps off with
the hopes of disrupting Chai's movement.
My Mars destroyed an eldar
escort with a nice Nova Canon shot, and full squadrons of fighters
were launched to try and engage any eldar bomber waves.
Chai moved nicely around my
torpedoes and launched a frightening number of bomber and fighter
squadrons, and shot torpedoes at my battleship.
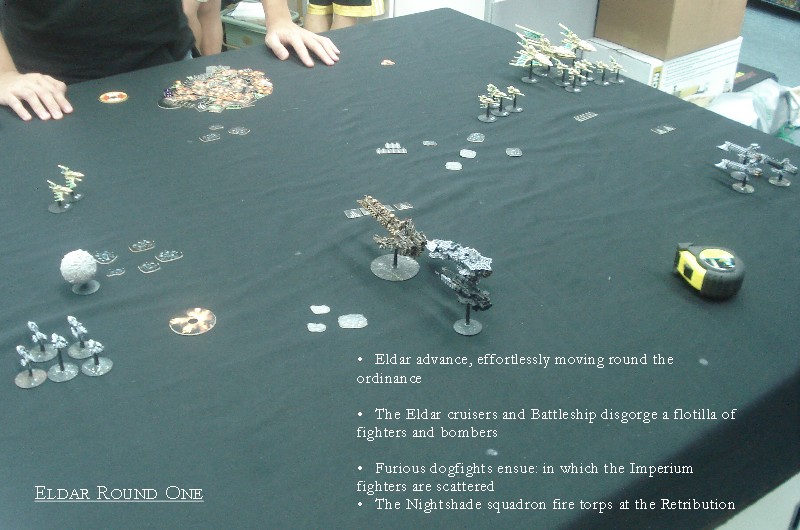
In Chai's ordinance move the
escorts on the left ran for cover, while his bombers massed behind
fighter escorts who took out the Imperial fighters, and managed to
maintain their cohesion, while new squadrons had to be scrambled
from the Imperial ships.
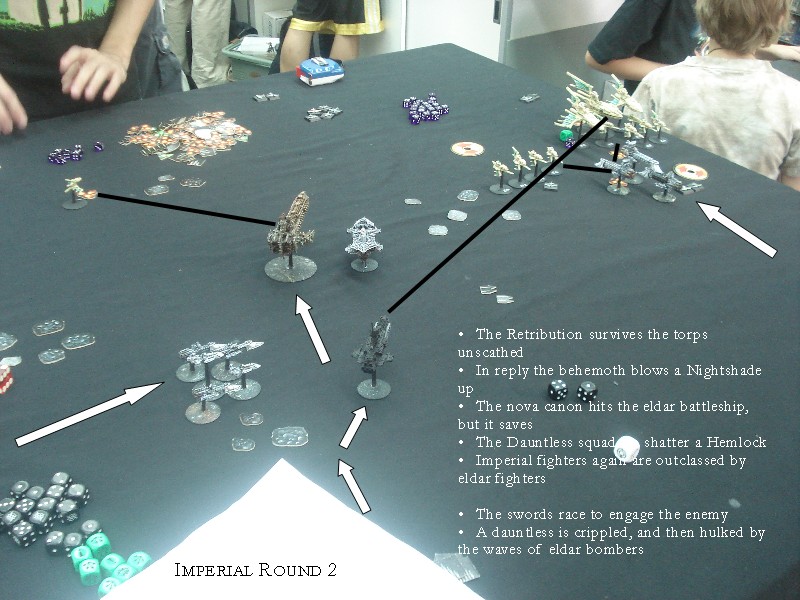
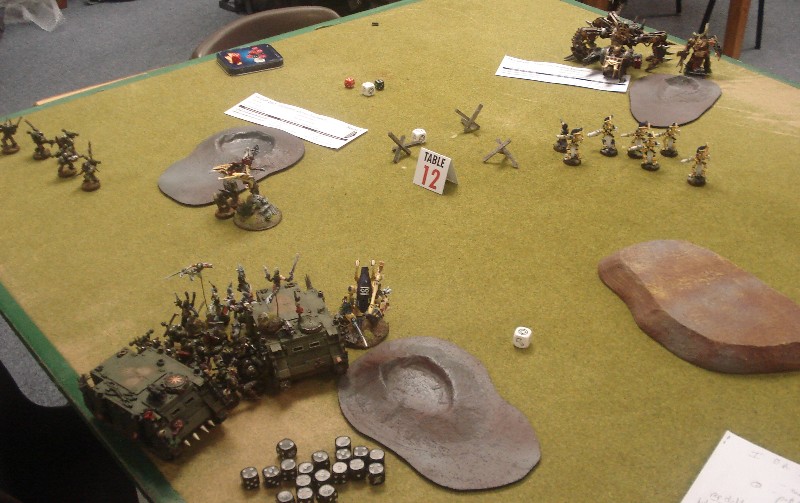
Round 2
I reloaded ordinance on my
Mars, with the help of a re-roll, and then my battleship and grand
cruiser failed their ld8 lock ons. The Mars' fighter squadrons
hurried to try and protect the squadron of light cruisers on my
right.
The Nova canon hit the eldar
battleship, but it was saved by its holofield.
The light cruiser squadron
destroyed an eldar cruiser, and the Retribution blew up one of the
eldar escorts on the left.
One of the dauntlesses
failed two lock ons in a row, and was turned into a hulk.
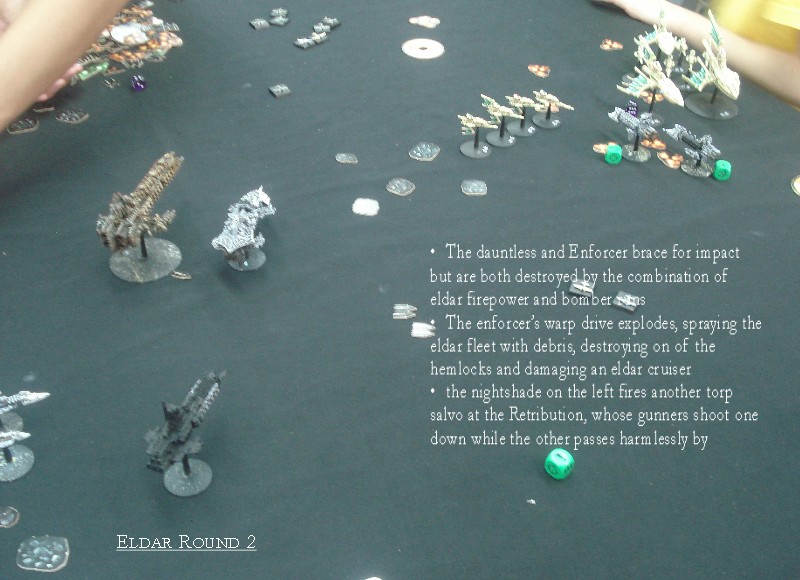
In Chai's phase the hulk
moved forward a little, and then the warp-drives imploded,
scattering the Eldar fleet with debris. One eldar escort was
destroyed, and the cruiser took two hits.
The enforcer failed two
brace for impact rolls and was turned into a hulk, and the other
dauntless was overwhelmed by a ferocious bomber raid, after the
Imperial fighters were again scattered by the unbeaten eldar ace
squadrons. It suffered 15 bomber hits, and despite
successfully
bracing, was also crippled.
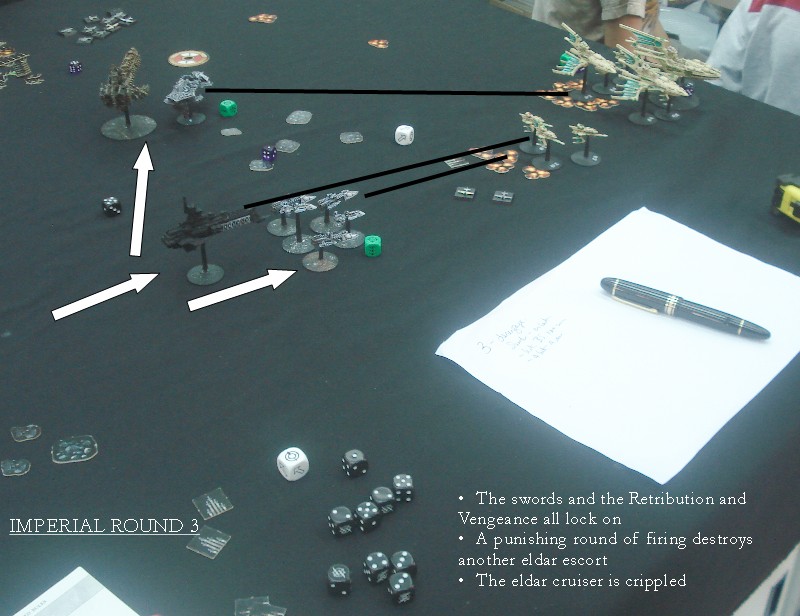
Round 3
The admiral called on the
limping dauntless and enforcer to disengage, which they both did
successfully.
The swords took out another
escort with massed battery fire, while the eldar battleship was
again hit by the nova canon, failed its save and took a point of
damage.
The hindmost of the eldar
cruisers was punished by the Vengeance and Retribution who
successfully locked on, using up the second of my re-rolls.
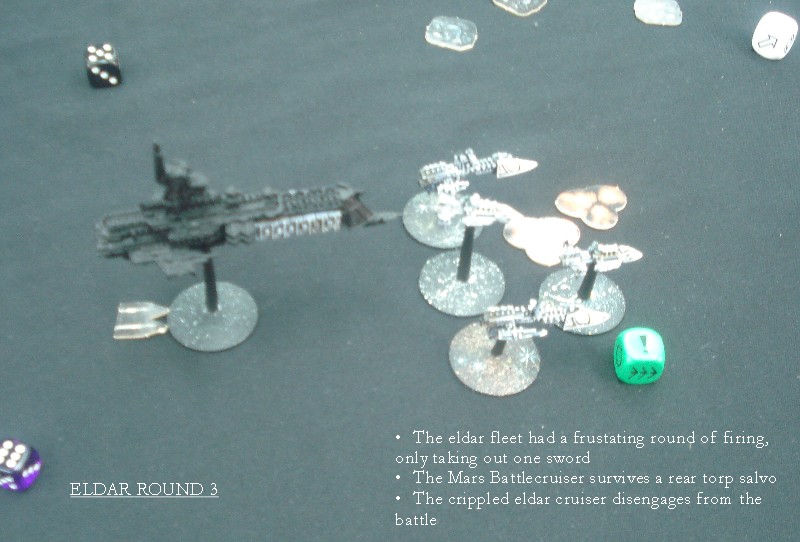
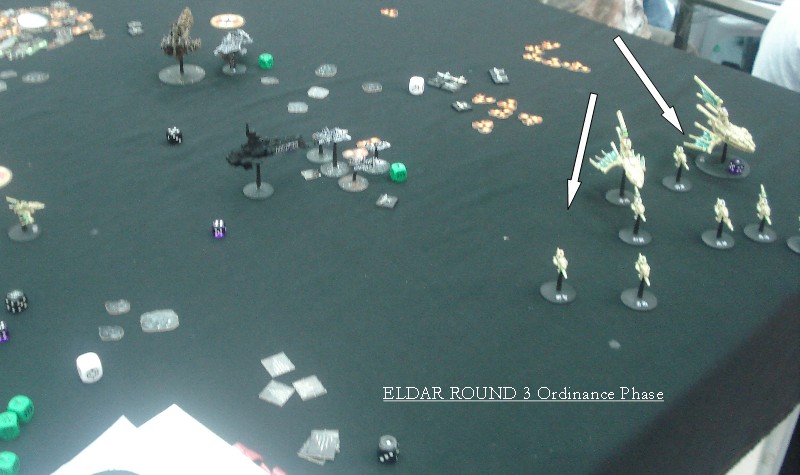
In Chai's round he
successfully disengaged the crippled cruiser. He had a bad
shooting phase, and his other cruiser suffered a bridge collapse.
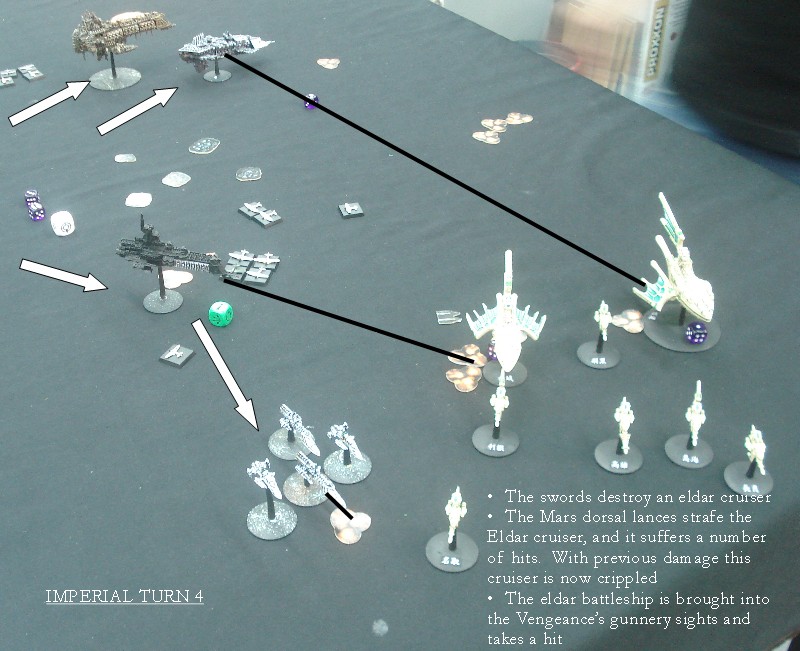
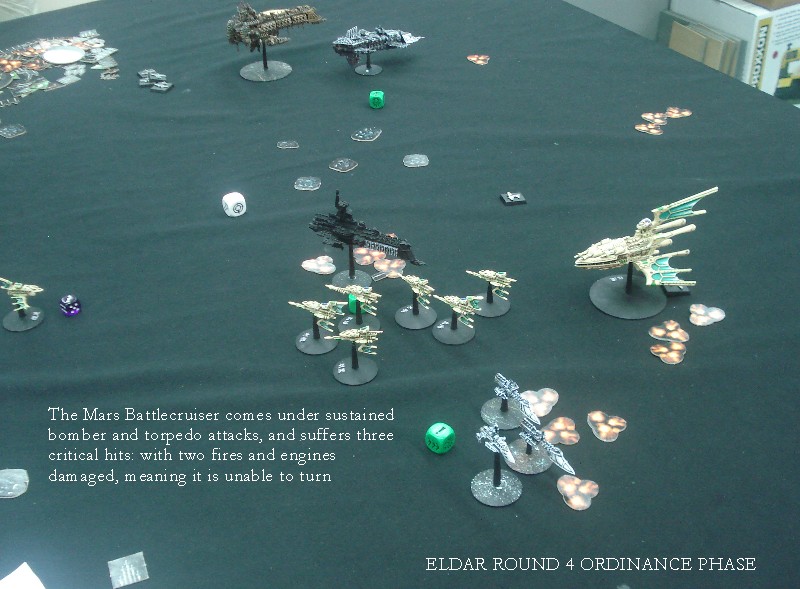
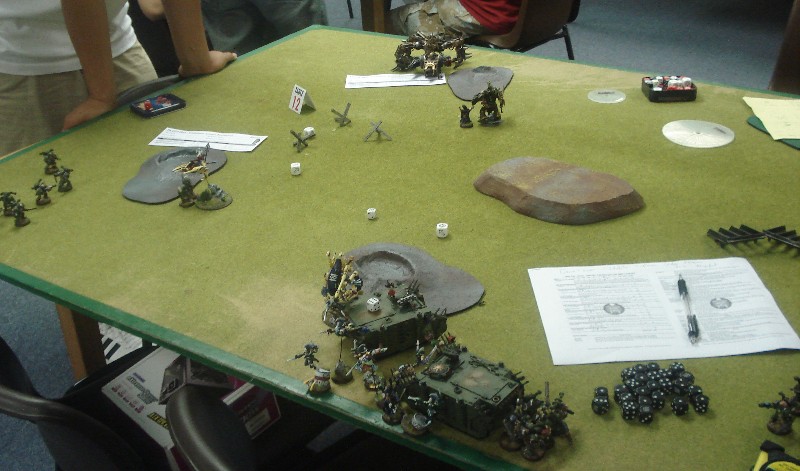
Round 4
The heavies failed their
lock on rolls, and went on to fail all of their lock-ons for the
rest of the game. Despite this their combined salvos of 22 strength
batteries, and five lances crippled Chai's remaining cruiser, with a
bit of help from the Mars. The swords took out an escort,
which was all their could target, as each of these escorts was a
single squadron.
Chai's turn had mediocre
shooting, but his bomber attacks on the Mars were punishing, with
three critical hits caused out of a total of 5 hits: causing two
fires and also damaging the retro burners, meaning the Mars could
not turn until these were repaired.
The admiral called on his
crew to put out the fires, and they admirably managed to put one
out, but failed to put out the others, taking the Mars down to 2
points and burning.

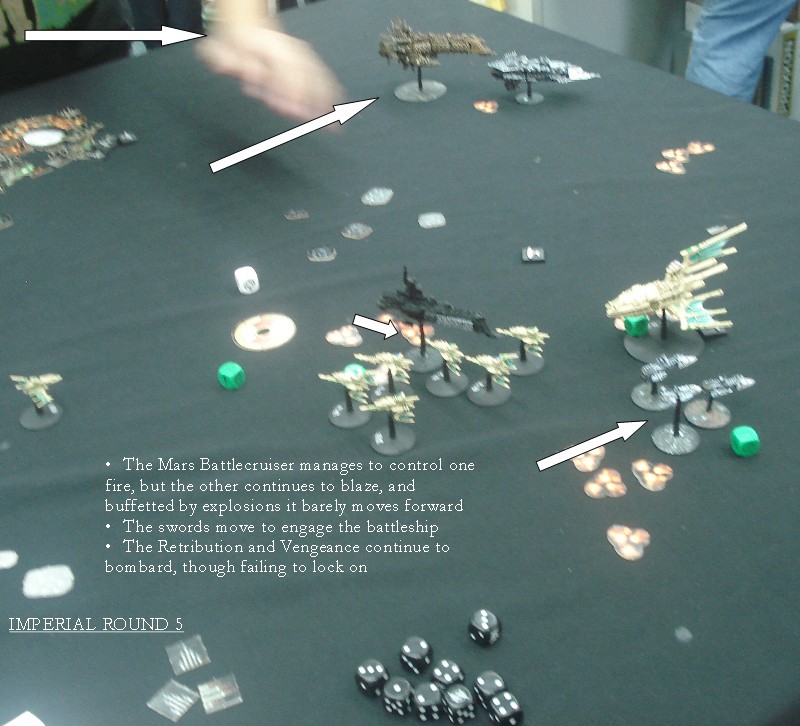
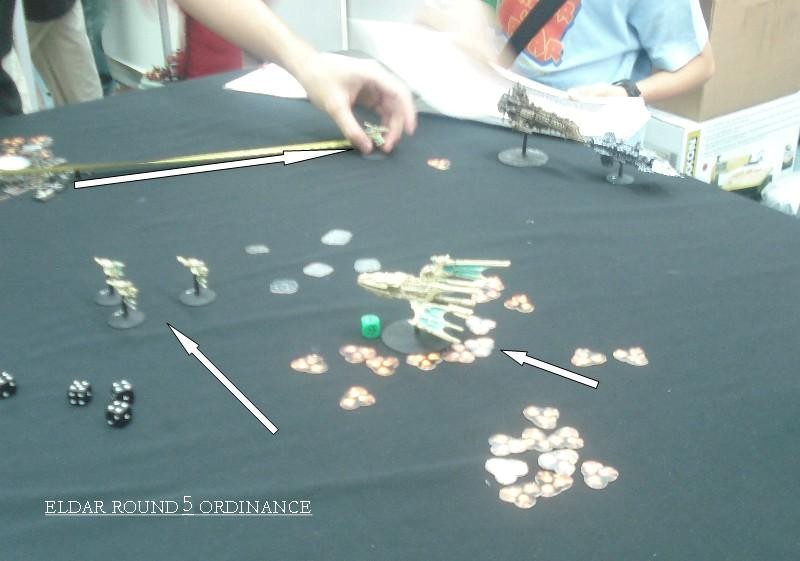
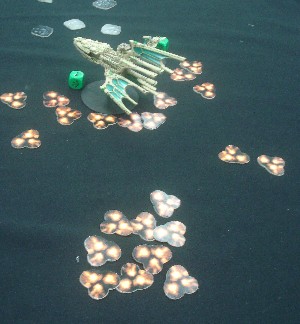
Round 5
The Mars opted to fire
rather than disengage, but was too crippled to cause any damage.
The swords managed to lock on and caused a considerable amount of
damage to the eldar battleship, which managed to save most of these
having successfully braced for impact.
In Chai's round the
battleship replied with a vengeance, and destroyed the remaining
swords
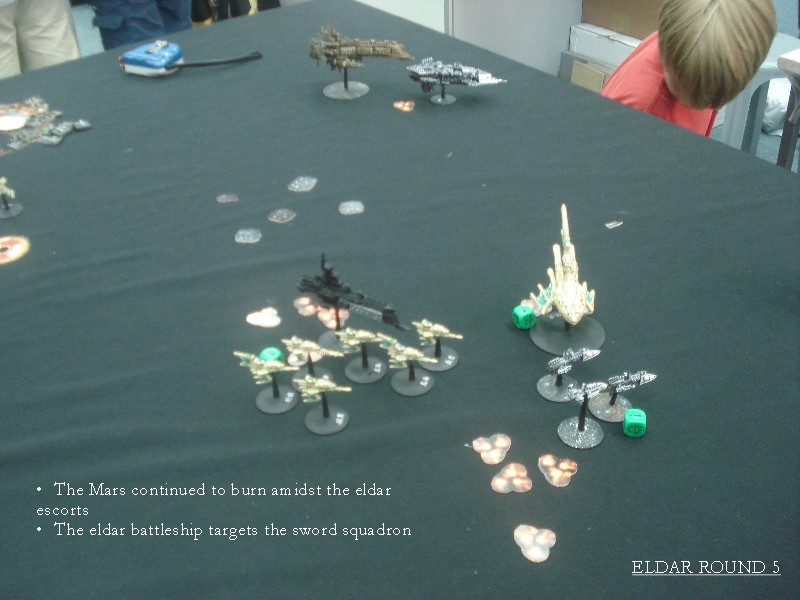
The Swords are destroyed,
and Chai's moves the rest of his fleet away while bombers move into
the crippled Mars.
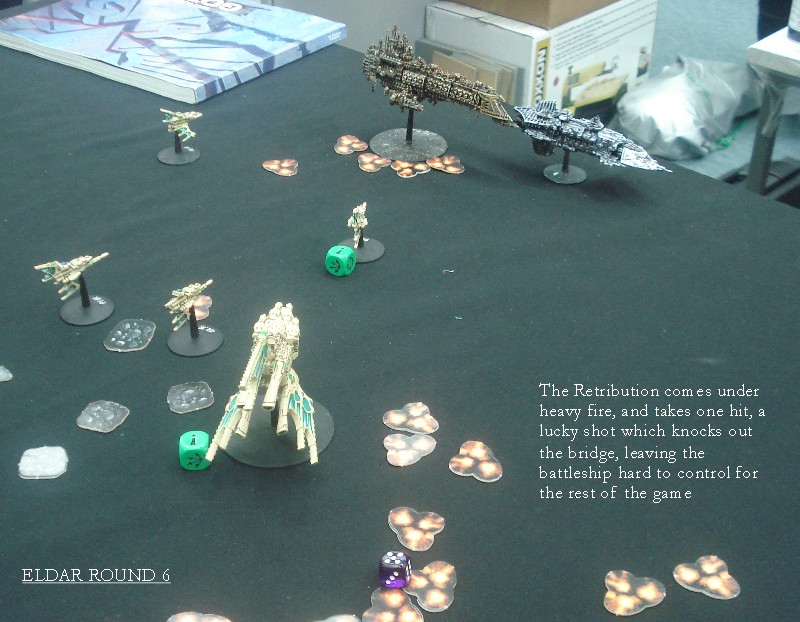
Round Six
Right: My Mars class
battlecruiser failed to disengage, and explodes, taking the brave
admiral and his staff with it. Happily his death is not wasted
as the explosion causes four points of damage to the eldar
battleship, but the battleship saved all hits.
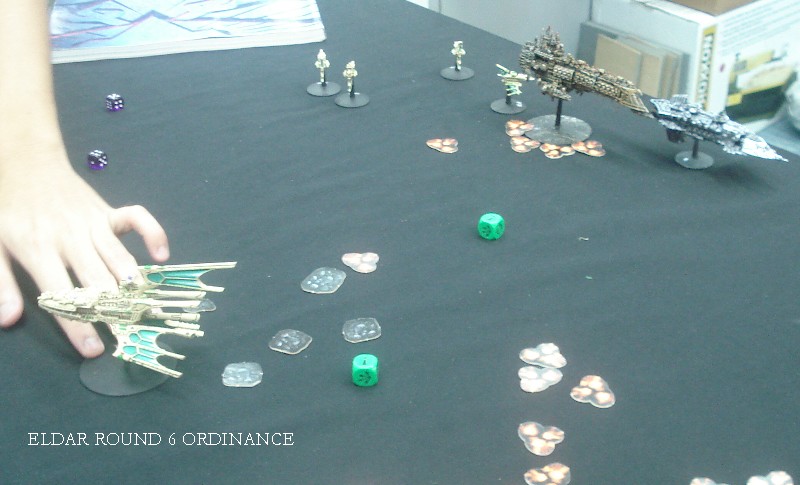
Below: My ships again failed
to lock on, but start to circle round to keep the eldar fleet in
their sights.

Chai heads through the
asteroid field to get behind the Imperial Fleet.
His battleship starts a game
of cat and mouse, nipping behind the asteroid field after shooting,
and keeping out of sight of the imperial firepower.
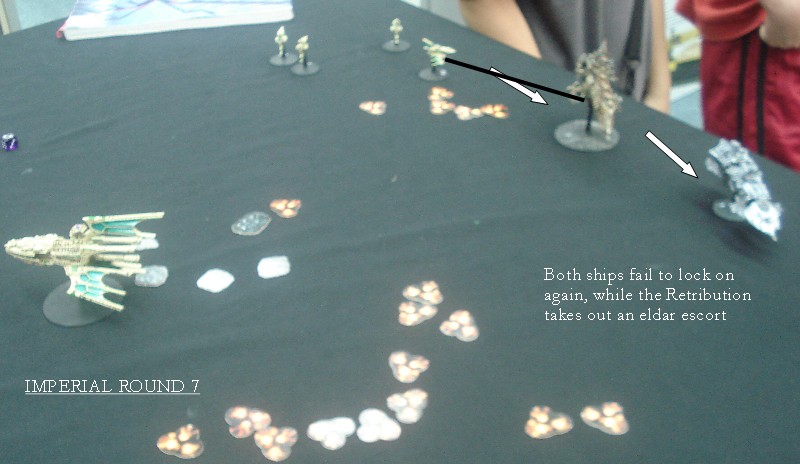
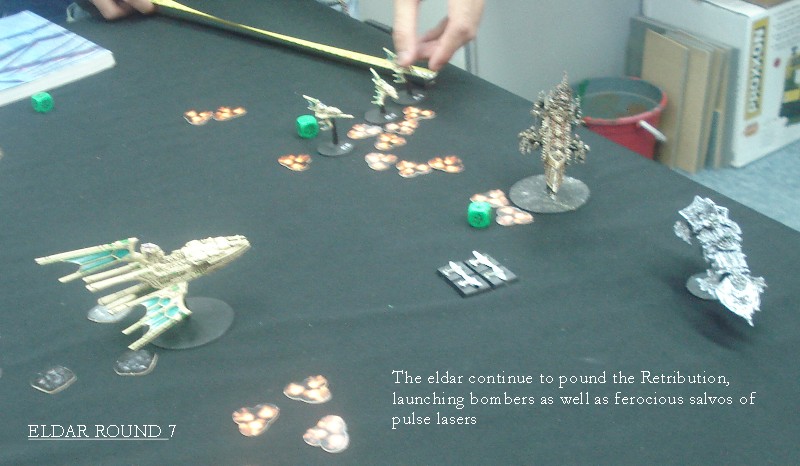
Round 7
The Vengeance fails to lock
on, while the Retribution struggles along with a destroyed bridge,
on a paltry ld 5.
It does manage to destroy
one of the escorts.
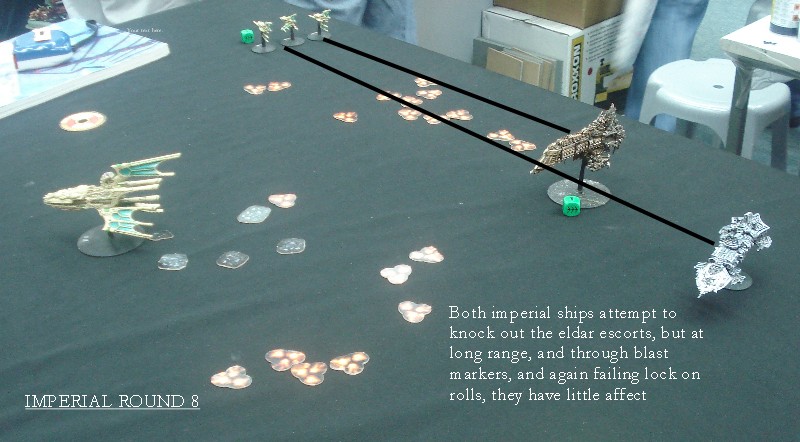
Round 8
The final round is fairly
uneventful. I fail to lock on once again, hit the distant
eldar escorts but fail to do any damage.
In the final eldar phase,
the Retribution suffers two more hits, one of which is critical,
causing the shields to collapse.
It is as this rather dire
moment that the battle came to an end, with another squadron of
eldar bombers ready to attack.
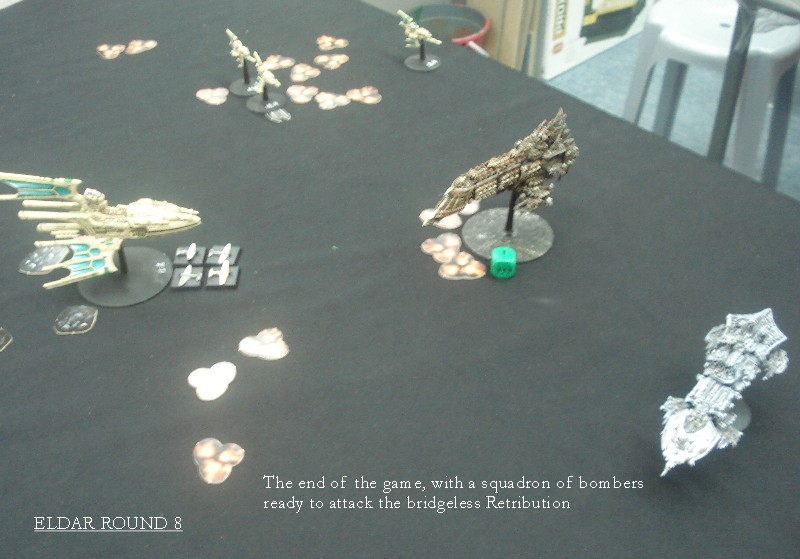
Eldar 810
Imperial 775
DRAW
Conclusions
For a first run out I was
pretty happy with a draw against eldar. I found out afterwards
that this was also Chai's first game against Imperial, so a draw
seemed quite reasonable. Analysing the game after I wondered
whether I should have lumped all my big guns together, as they could
have had more effect perhaps spearheading two of the squadrons.
But I Chai deployed his main ships well after my entire fleet had
been deployed, and if I had put one of the two bigger ships to the
right, then he could have deployed the bigger ships to the far left.
I never got to fire both
broadsides, which seems a critical thing to achieve, meaning you're
maximising your firepower, but was always tacking to keep the enemy
within the range of one of my broadsides. I should have tried
to disengage my Mars class cruiser as soon as she was down to 3
points with two fires burning, which would have tipped this battle
into a draw in my favour - but I was very pleased overall, and had a
lot of fun playing against Chai.
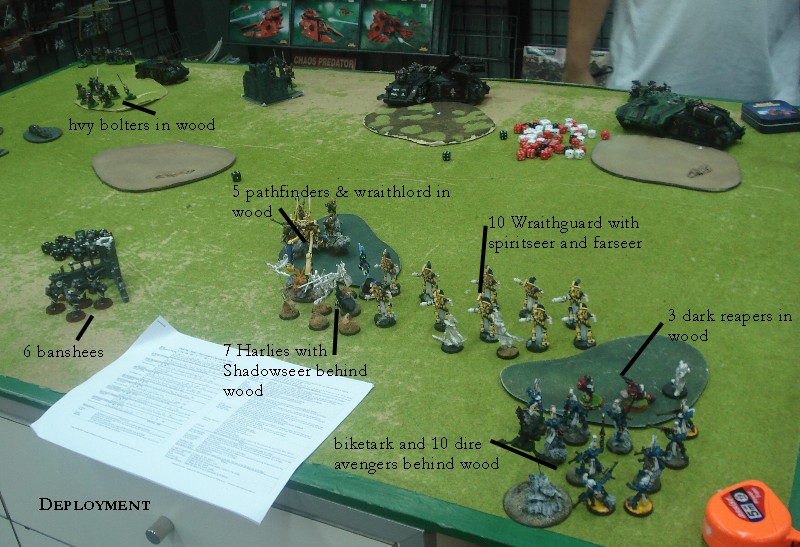
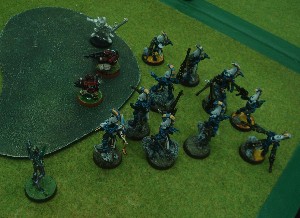
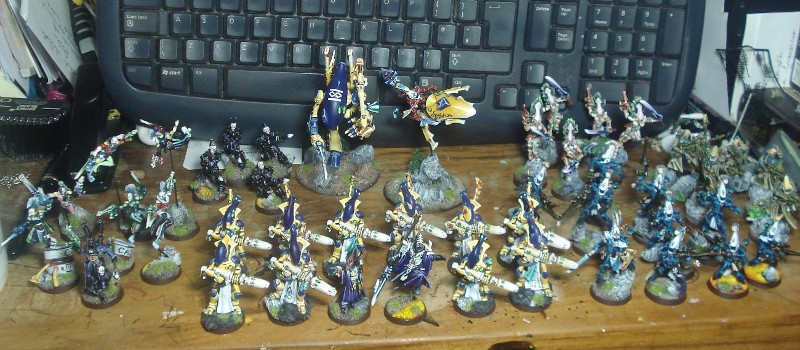
Iyanden vs. Witch
Hunters
This is not the list I would
like to run for the Hong Kong GT, but the list I'm forced to play as
some of my figures have gone adrift in shipment from the UK.
Bla bla bla. Anyway, here is the list:
Farseer: singing spear,
doom, mind war, fortune, spirit stones
Autarch: jet bike, fusion
gun, laser lance
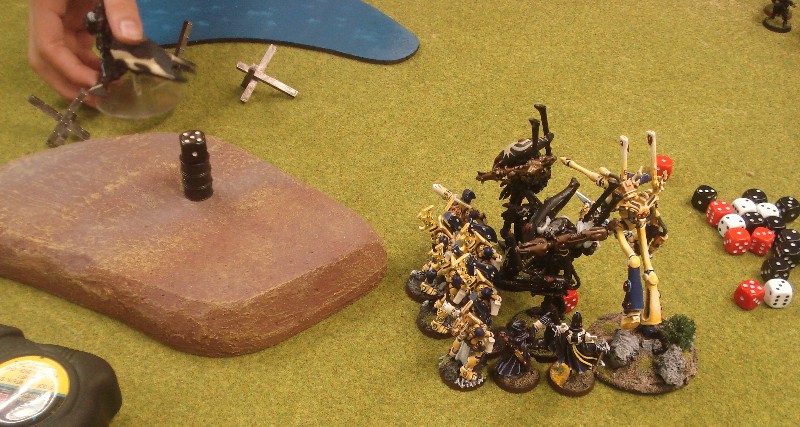
10 Wraithguard + spiritseer
(troops)
7 harlequins with shadowseer
(all with harlequin kisses)
10 dire avengers + exarch
with defend and bladestorm, shimmershield and power weapon
3 dark reapers
6 howling banshees
Witch Hunters:
2 exorcists, chimera and
rhino with troops inside, 8 seraphim, retribution squad with 3 heavy
bolters, and one multimelta, Immolator
As I write this list it
seems as though my opponent was playing with 4 hvy choices, but here
goes.
My plan was to advance with
the wraithguard and farseer, who soak up a ton of fire with conceal
and fortune, and then counter attack with banshees and harlequins if
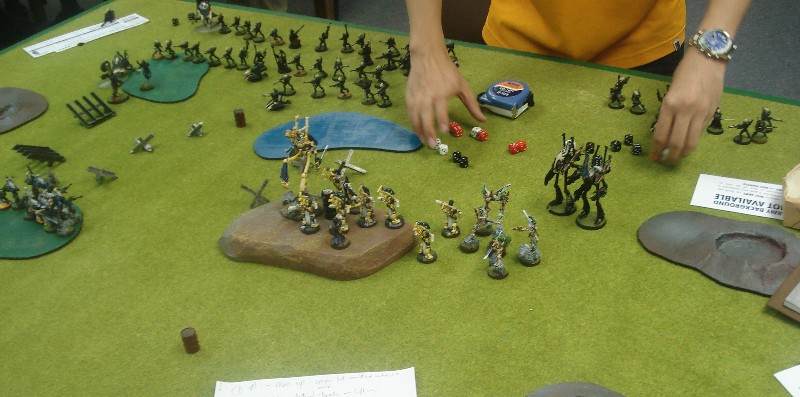
anyone tries to assault them. We were playing Cleanse,
although we forgot to deploy in corners.
Round 1
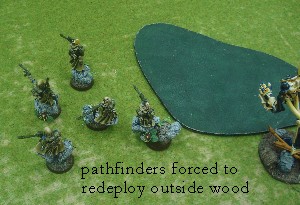
The first event was
the callidus assassin forcing my pathfinders to redeploy 6'' outside
the wood.
The witch hunters advanced,
while my pathfinders moved back into the wood, and the wraithguard
advanced up the side, and the Autarch moved to the left to hide
behind the woods with the harlequins.
The Wraithguard were
pummelled by both exorcists, but with fortune and conceal they only
took one wound. In reply the wraithlord hit and penetrated an
exorcist, but only stunned it.
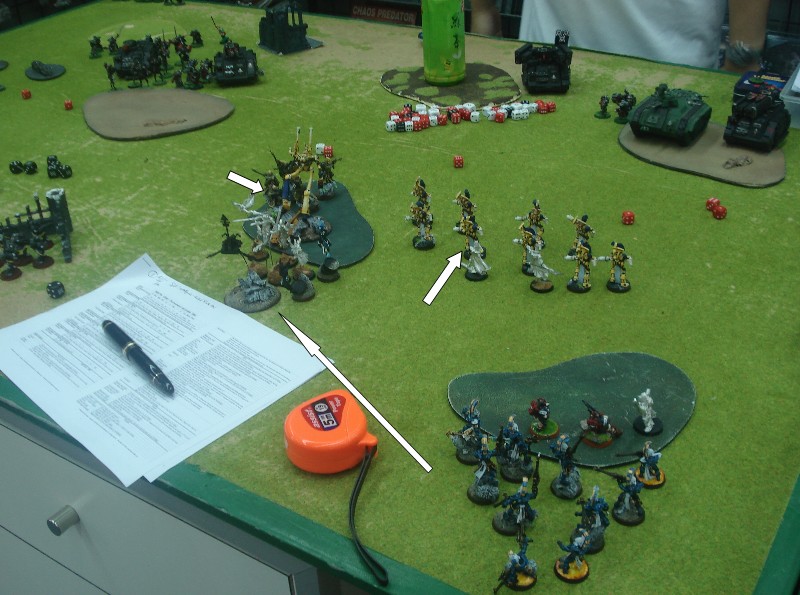
Round 2
The callidus assassin moves
on to attack the dire avengers: though only killing two before
assaulting, and then killing, the exarch.
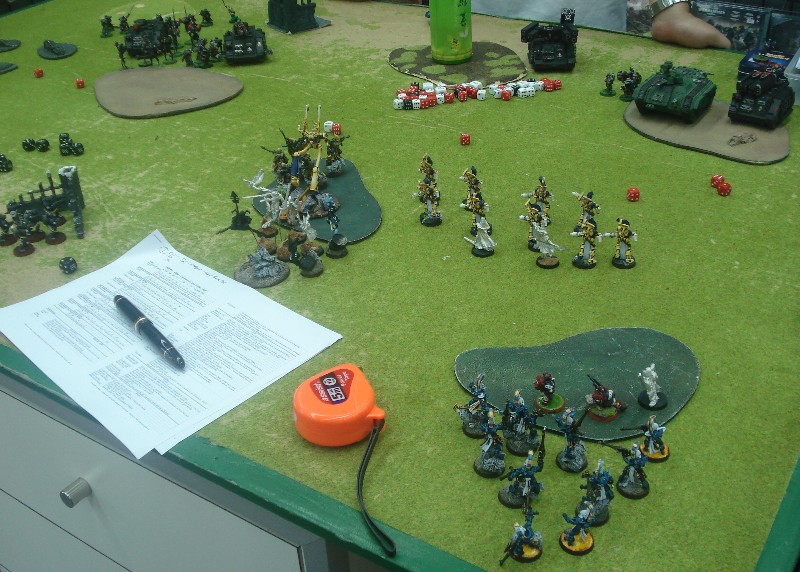
The wraithlord suffered a
wound from the exorcist.
The wraithguard shrugged off
a fusillade from the dominator squad on the hill - but suffered no
dead. The immolator roared out and flamed the pathfinders,
killing three of them, although they passed their ld roll and
hunkered down to return fire.
Before the dire avengers
could fight back, the callidus assassin disengages from battle.
Round 3
The Wraithguard
continued to advance and wiped out the squad facing them. The
farseer mind war-ed the priest, frying his brain, and the autarch
swept out to blast the immolator from point blank range with his
fusion gun. He hit and penetrated, but again I rolled 1, and
only stunned the thing.
The callidus assaulted
again, and killed a few more dire avengers, killing all but one with
the flamer template in the WH round.
Round 4
A rhino full of sisters
roared along the flank, and I moved the autarch to fry the rhino,
and then banshees out of cover to hopefully assault anyone who might
come out of the thing.
The harlequins moved up to
assault the dominator squad, but their fleet left them just short of
an assault. The wraithguard put a number of large holes into the
chimera, and the callidus ended up killing the last dire avenger,
flamed the dark reapers, killing two, and assaulted the last,
resulting in a little combat where they killed each other.
The autarch penetrated the
rhino, and at last I rolled a boom! and six of the ten sisters died
in the explosion. The autarch and banshees assaulted the rest,
and wiped them out, and then consolidated behind the hill. The
Immolator shrugged off the assaults of the harlequins, and moved to
fry five of the six banshees.
In the WH's round the
wraithlord finally succumbed to the exorcists's salvos. The
seraphim assaulted the wraithguard, but failed horribly, and the
wraithguard struck back with a vengeance, killing three of them.
The last one failed her ld and was run down and torn into shreds by
the wraithguard, who then consolidated 5'' round the wood.
Round 5
The wraithguard moved into
shooting range of the exorcists. The harlequins cut the
dominators into steaks, while the rest of the sisters retreated.
Three wraithguard were killed by another exorcist salvo, but kept
advancing: killing the remaining sisters.
The game ended with the
witch hunters with one exorcist, backing desperately away from the
wraithguard, and a sound victory to the Iyanden.
Hong Kong 40K GT
For any of you familiar with
these pages or my blogs, you'll be aware that I was playing an
Iyanden list with an army hugely hampered by the fact that the
transports I have for them were not going to arrive in time for the
GT. And also that my real aim, not being much of a 40K player,
was to win best army.
For pictures of the army in
progress:
here
For pictures of the finished
army: here
LIST
1500 Pts - Eldar Roster -
Iyanden Tournament List 1500 J Hill #17
1 Autarch @ 140 Pts Jetbike, Mandiblaster (Mb); Laser
Lance (LL); Fusion Gun (Fg)
1 Farseer @ 128 Pts - Fortune ; Mind War ; Spirit Stones;
Singing Spear
10 Wraithguard @ 399 Pts; Spiritseer Conceal, Singing Spear
7 Harlequin Troupe @ 184, shadowseer, all with kisses.
6 Howling Banshees @ 102 Pts; Exarch Executioner (Ex)
Troops: Dire Avengers (10#, 147 Pts)
10 Dire Avengers @ 147 Pts Exarch with Shimmershield
5 Pathfinders (Rangers) @ 120 Pts
1 Wraithlord @ 140 Pts; Wraithsword (Ws); Bright Lance (BL)
4 Dark Reapers @ 140 Pts
The night before, as I
finished my army..
The venue was the same as
the Fantasy GT and the tables were
pretty much the same, but the event was only 1 day, with four
matches, as opposed to the full two day fantasy GT. Well what
do you expect - this is Warhammer Lite!
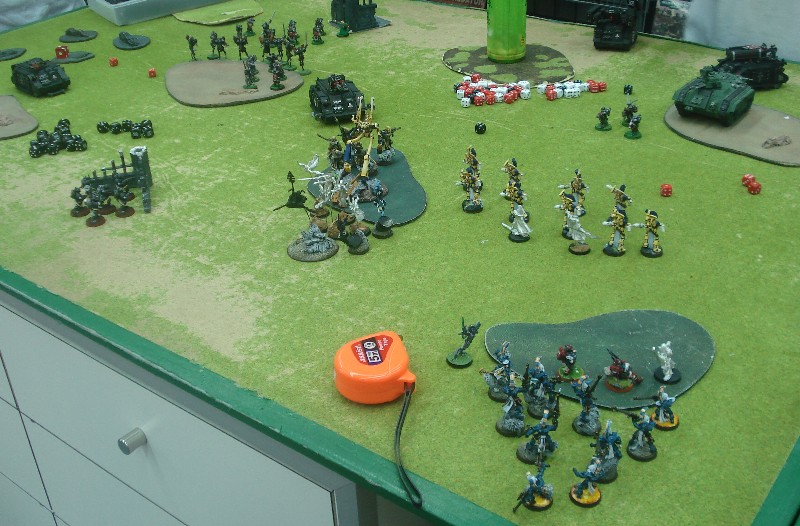
Game One
vs Evan with Chaos Space
Marines
Evan had two defilers, a
demon prince, two squads of marines with rhinos, some infiltrators
and some demons. Lots of nurgle marks through the whole army.
The scenario was Cleanse.
Deployment
I was quite pleased with
this table, as it had a great big hill to shield me as close
to the enemy as possible. I won all the rolls, chose table
edge and got my wraithlord down in the middle. Behind them
were banshees and harlequins, with the dire avengers and autarch
hiding with them, and the pathfinders bunkering down in some craters
on the far left.
Evan set up in the opposite
corner, with defilers, swarms, rhinos and his demon. His
infiltrators appeared among the tank traps on the middle right of
the picture (with the other figures behind them actually being in the
rhino/waiting to be summoned.)
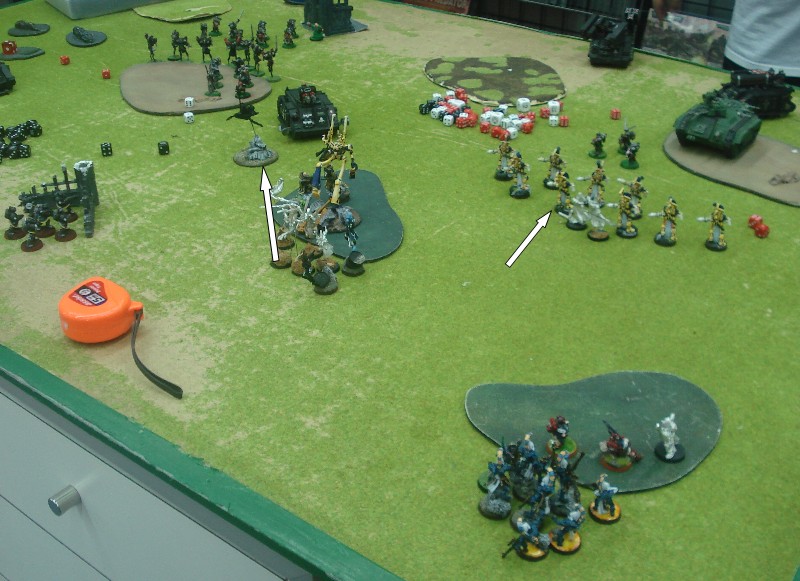
Round 1 I lost the
roll to go first, and Evan targeted my wraithguard with his
indirect firing, missing them, but killing one banshee, the banshees
staying calm and passing their pinning test. My scouts were
the target of the other defiler and I rolled pretty well on their
saves (eight I think) and only one being removed. Rolling so
well early on in the day made me feel pretty confident for the rest
of the game.
 In my turn I moved forward, my autarch moving to behind the scouts,
attempting to pop a rhino and then assault some of the marines
there. But he failed to scratch the rhino. My reapers
targeted the infiltrating marines in the tank traps, killing one,
and my banshees sped across the table to try and wipe them out.
the banshees failed horribly in combat, barely denting the T5 enemy,
who struck back and killed one of them.
In my turn I moved forward, my autarch moving to behind the scouts,
attempting to pop a rhino and then assault some of the marines
there. But he failed to scratch the rhino. My reapers
targeted the infiltrating marines in the tank traps, killing one,
and my banshees sped across the table to try and wipe them out.
the banshees failed horribly in combat, barely denting the T5 enemy,
who struck back and killed one of them.
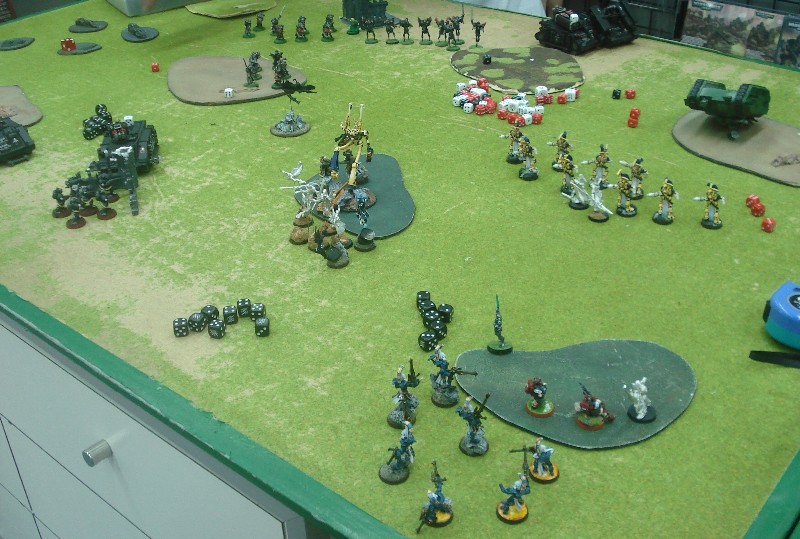
Round 2
Evan disembarked both squads from the rhinos and threw everything he
had at my pathfinders, who had worried his greater demon in round 1.
The remaining 4 pathfinders made eight saves from a fusillade of
bolter rounds, but two more died.
 In
my turn I kept advancing, and tried to mind war the demon (and
rolled 11) and then tried to fortune my wraithguard (and rolled a
12). My farseer failed his invulnerable save, and was clawed
off into the warp - instantly killed by the str6 wound. In
my turn I kept advancing, and tried to mind war the demon (and
rolled 11) and then tried to fortune my wraithguard (and rolled a
12). My farseer failed his invulnerable save, and was clawed
off into the warp - instantly killed by the str6 wound.
Luckily a great shot from my
wraithlord nailed one of the defilers, and while my banshees killed
three of the marines, they were in turn wiped out, and the marines
consolidated towards my dark reapers.
Round Three
Without my farseer to guide
the troops along the paths of fortune, the wraithguard started to
take some wounds, and my dire avengers got ready to try and do some
damage to the rhino marines, while the autarch knew when to flee and
sped back to the safety of the harlequins. My wraithguard assaulted
the swarms, and there was a short and vicious fight before the swarm
was wiped out.
Evan summoned his demons in
the crater where the last scouts were holding out against the
demons, and re-embarked and moved to take out more of my army.
In my turn my autarch and wraithlord both took pot-shots at the
rhinos, and both miss and fail to even shake the enemy. The
last of the scouts failed his ld test and fled.
Round 4
Both rhinos sped towards my dire avengers and shredded them all in a
terrible fusillade. My wraithguard moved closer to the defiler
and demon prince which had been targeting them with the ordinance
as they approached.
With dark reapers, banshees,
pathfinders, and dire avengers all dead, I thought this game was
pretty much over and lost. My wraith guard blew a handful of
holes into the last defiler, the first of which incinerated it in a
climactic explosion. I gambled by sending my harlies down to
tackle the two squads of marines hiding between their rhinos, while
the autarch went to try and pop a rhino and reduce their mobility.
The harlies got 6 for their
fleet roll which was enough to bring them into combat, and they
wiped out an entire squad in the first round of combat. The
wraithlord tore holes through the nearest rhino, and the autarch
assaulted the demons, killing one of the three remaining, and taking
a wound in return.
Round 5 Evan responded by
re-embarking his remaining unit and fleeing for safety, while his
demon prince flew to attack my wraithguard.
He did terrible damage to
the reanimated warriors, while in my turn my harlequins managed to
catch up with the rhino and hit it with haywire grenades, one of
which blew the rhino, and wounded four of the remaining marines, who
were then entangled.
Round Six The demon prince
finally crushed my warlock, while the wraithlord tried to shoot him
down, and the autarch continued to struggle with the demons.
The game ended with my harlequins assaulting his remaining marines,
and taking them down to a non-scoring unit, while my wraithlord
moved to take control of a table quarter.
I only had 394 points left on the table, but Evan had even less, and
with the table quarter I had taken, this ended out as a minor win
for me: 1602 vs 1106
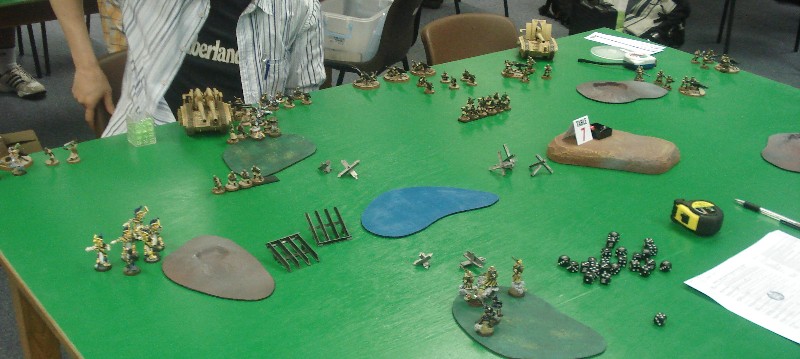
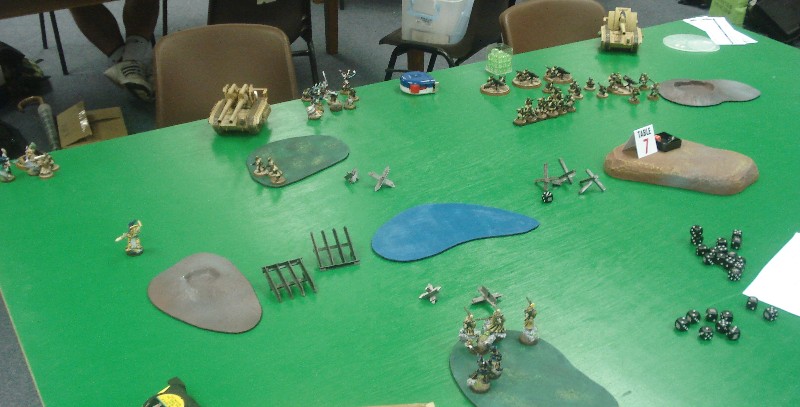
Game 2: Table 7
My second game caused quite a chuckle as I was up against my Tuesday
Club sparing partner, George Yow with his IG gunline. My first
game against George was back in the Fantasy GT, when he was playing
Wood Elves, and we fought each other to an excellent draw. I
had faced George a couple of times in the intervening period,
beating him twice (I think!) - but he had honed his list since, and
also had a better idea of what an Iyanden list could do. So
there was plenty to fight for, but the guarantee of a fun game
against an excellent opponent.
In fact after the first game most of the top tables had at least one
of the Tuesday Club playing, which made me feel that at least my
dismal run with this army was not entirely due to inept general
ship.
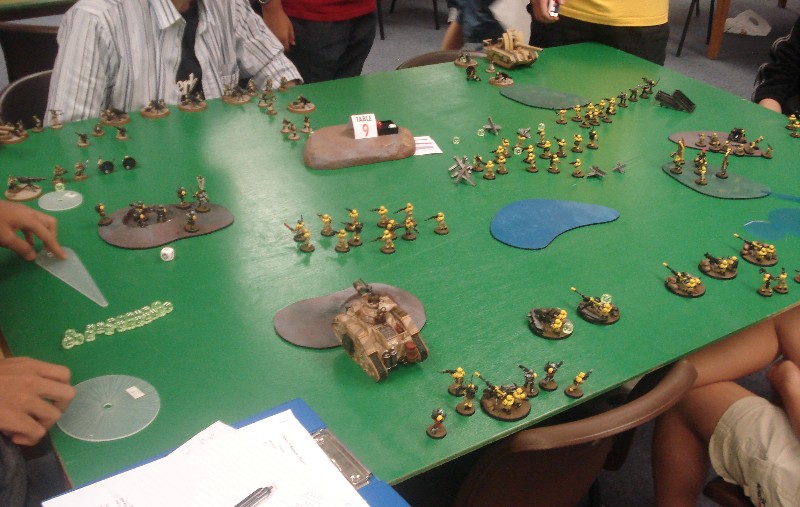
George's list was 2
basilisks. a couple of infantry platoons, a hvy weapon platoon with
lascanons and a platoon with missile launchers, and then three units
of vets with 2 plasma guns and a lascanon each.
The scenario was recon (?) -
with all units reaching the enemy deployment zone getting double
victory points. With my previous record against George and the
fact he would have to move his army across the table meant I was
feeling quite confident going into this battle. My plan was to try
and take on half his army, and I put the wraithlord and harlies in
the middle to try and throw George as to which side I would deploy
on.
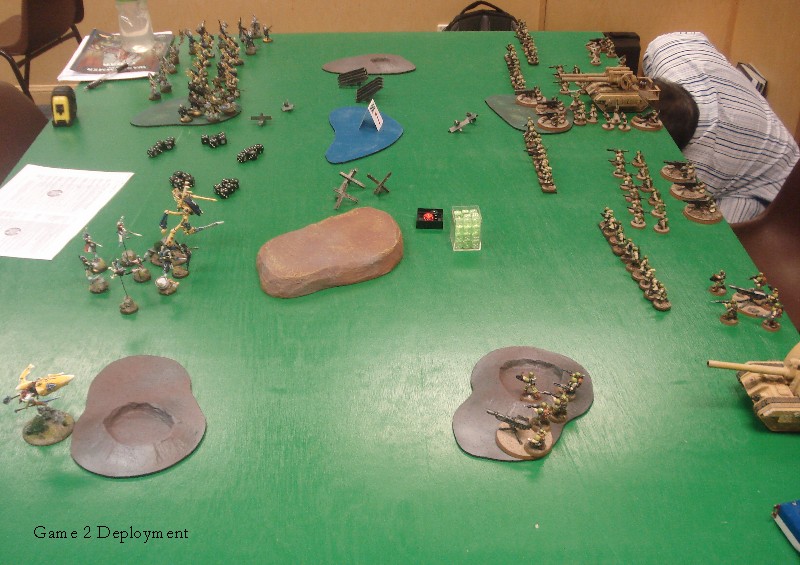
Round 1
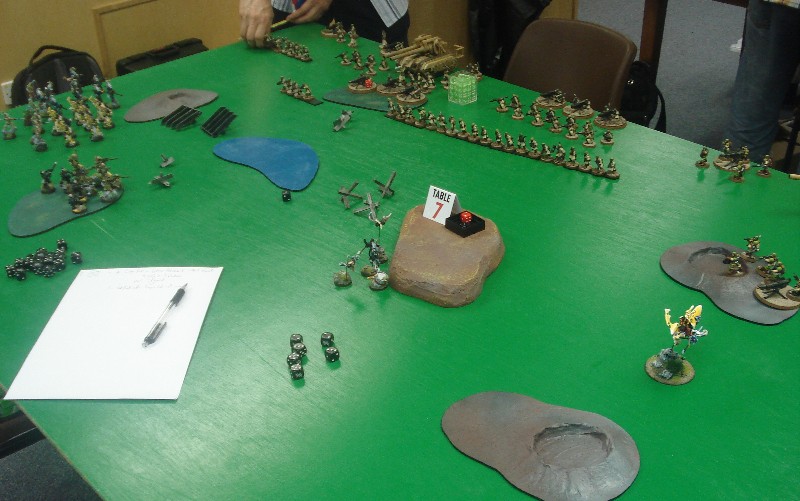
George got the first round, which proved to be a complete disaster
for me, as his first basilisk shot hit my farseer on the head, and
of course he failed his invulnerable save and was instantly blown
into a bloody hail of wraithbone scraps. I lost three
harlequins to another basilisk shot, and three wraithguard.
On my round I moved all my
forces on the left into the gap between the craters (which blocked
LOS) and the left table edge. I had bad fleet rolls, and my
units remained very pressed together. My snipers took out a
couple of troopers from the nearest lascanon squad in the wood on
front of them, and the autarch zipped over the crater trying to
target the vets in the crater opposite him, but failing by half an
inch. I was feeling nervous
as I prepared for the next round's shooting.
Round 2
A lascanon shot zapped the autarch out of the sky, but the rest of
the shooting wasn't too awful, only losing a couple of banshees to
a stray basilisk shot.
In my round my dark reapers
and snipers passed their ld tests to target whoever they wanted, and
they took out an entire command squad, leaving the las canon still
shooting. The dire avengers did slightly better, taking out a
missile launcher squad sheltering near to the basilisk.
Round 3
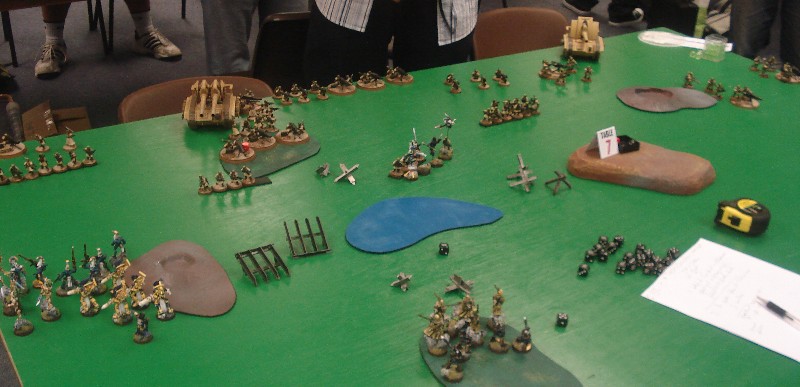
On the far flank George's vets were speeding towards my deployment
zone. A basilisk shot killed two snipers and two dark reapers,
but both units passed their pinning tests. The harlequins survived a
lasgun fusillade, and in my round they charged into combat while the
rest of my troops continued pushing forward. The dire avengers
and banshees failed much less well and were all but wiped out by
concentrated fire from the IG lines. The exarchs from each
unit were all that were left, but they reached the lines of the IG
and found relative safety in combat. The harlies wiped out the
IG around them, and consolidated towards the basilisk.
Round 4
I was feeling fairly confident that my wraithguard would destroy the
basilisk this round, as I still had 5 wraithguard alive, and four
harlies mopping up the last IG on the left of the battlefield.
Unfortunately I lost a
wraithguard to a lasgun shot, and then three more and the spiritseer
to a point-blank basilisk shot.
In my round I failed to hit
the basilisk, and my harlies consolidated again into another combat.
Round 5
The last two rounds were very tense, with the battle finely
balanced between oblivion and victory for the forces of Iyanden.
My harlies mopped up the last of the IG troops on the left, and
consolidated towards the IG in the centre. My exarchs finally
managed to wipe out the troops they were facing, and consolidated
towards the woods where three troopers were hanging on in the woods.
Round 6
My snipers made a break for cover while the harlequins were spotted
by a long-sighted man in their ranks killing three of the four
remaining. The exarchs took out the troops in the woods, but
the dire avenger exarch was hit and killed by another basilisk shot.
The game ended with 960 vs
1199, giving George a minor victory, which was an excellent result
for the IG.
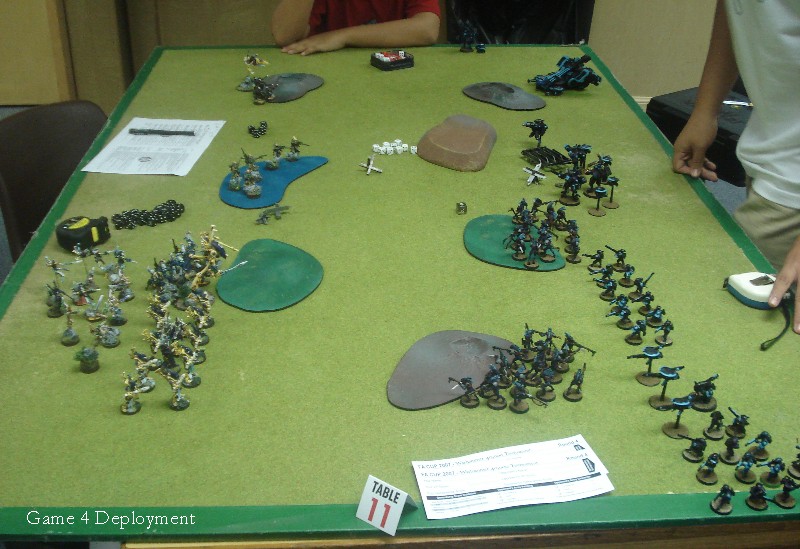
Game 3: Table 11
Oscar Tong had a serious Marine-killing eldar gunline, with a couple
of wraithlords, three squads of guardians with star canons, an
avatar to make the lot fearless, some dark reapers to add some more
firepower and lots of farseers and warlocks to improve the lot.
To add a little mobility to the lot he had a pair of vypers.
The game was to take
objectives, and Oscar placed his two objectives on his side of the
table, while mine were placed on the hill, by the lake.
Unluckily for Oscar, he then lost the roll for which table edge
meaning my forces held two of the four objectives at the beginning
of the game: one with the dark reapers and the other with the
wraithlord. It gave me a bemused air as I thought all I had to do
was hunker down and the game was mine.
Round 1
I got to go first and moved up my wraith-contingent behind the hill.
My snipers hit the opposing wraithlords but failed to wound.
My harlequins and autarchs moved up on the left to threaten Oscar's
wing.
In Oscar's turn his arm
shuffled from left to right, and with no attacking units I was
feeling very confident about this. My snipers had him worried,
however, and all the snipers and two of the dark reapers were killed
in the Guide-enhanced round of shooting.
Round 2
I moved my two remaining dark reapers back to take control of their
objective and shelter from any shooting, while the rest of my army
stayed behind cover, as I thought I could take out his mobile units
and then force him to attack me to win the game, while my harlies
chewed through his ranks.
Fortune goes to the brave
however, and doesn't favour armies who shelter behind cover.
My autarch missed his shot at the vyper, and in an effort to blunt
the only mobile shooting Oscar had my harlies assaulted it, and tore
it into strips.
In Oscar's round his avatar
assaulted my autarch, and his guardians moved forward far enough to
see my harlequins and I lost the lot of them, which proved to be a
battle-losing event.
Round 3
The Autarch finally succumbed to the Avatar, while the rest of my
army finally moved forward to start engaging the rest of the enemy.
The Dire Avengers moved into the wood to at least get a cover save
against the star canon barrage coming their way. The
wraithlord and wraithguard, with farseer moved onto the hill with
the banshees in close support. My plan was to slog on forward
and get into combat range and force the enemy from taking any of the
objectives.
My dire avengers took out a
handful of the front rank of guardians, but they passed their ld and
their star canon was just as effective as before. My
wraithguard were just out of range of the wraithlords facing them
and my wraithlord's bright lance failed to wound.
In Oscar's round he moved his wraithlords forward as one, which had
me surprised, as I had figured he was just going to stand and shoot
the entire game, and I found that while my wraithguard were just out
of range, the banshees were in charge range and ended up being
charged by two angry wraithlords. The banshees fled and the
wraithlords consolidated into my wraithguard.
Round 4
With my wraithlord facing so much fire power, I backed him off the
hill, thinking my wraithguard would be able to deal with the
wraithlords. However they were pretty stuck in combat, with
str 5 being little use when the enemy is t8. The combat was
drawn with a couple of wounds apiece, and it was looking
increasingly dire for my army.
Round 5
Seeing how bogged down my wraithguard had become I moved my
wraithlord up into the combat. In a desperate attempt to
claim the table objectives on my side of the table, I brought the
Dire Avengers out of the wood and set off on a sprint to get behind
the hill. They were let down by their fleet roll, and were
caught in the open.
In the combat, my wraithlord
caused two wounds on the wraithlord opposite him, and he finished
him off on Oscar's combat, but Oscar brought up his vyper to contest
the central objective above.
Round 6
The combat between the remaining wraithlord and my wraithguard went
on rather frustratingly, with the wraithlord being finished off, but
too late to help me out.
I killed 375 points from
Oscar's army, but he did a whopping 943 against mine, and when added
to his objectives, then it ended up being a major victory for him.
I was very frustrated, and
felt I had been overconfident - expecting my harlies to pull the
game out of the bag as they had done in the first game. Losing
them in the early rounds was a major setback, and the fact my other
troops had hesitated behind cover for a round, it meant when they
finally went over the top then they were easily isolated and wiped
out. Letting the wraithlords charge my banshees was a pretty
dumb mistake.
I left feeling very
irrigated with myself, losing a game I felt that I should have won.
But credit should also go to Oscar. He fielded a list with a
wealth of AP3 weapons, and when I threatened his line he responded
well with counter attack units.
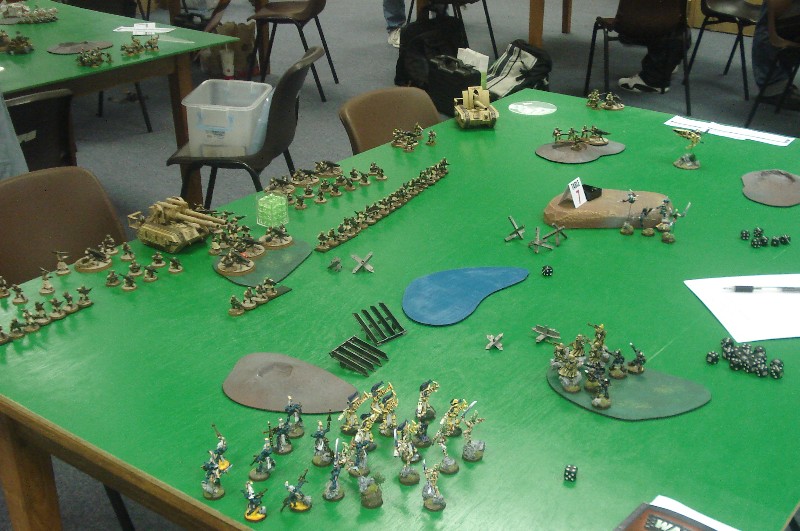
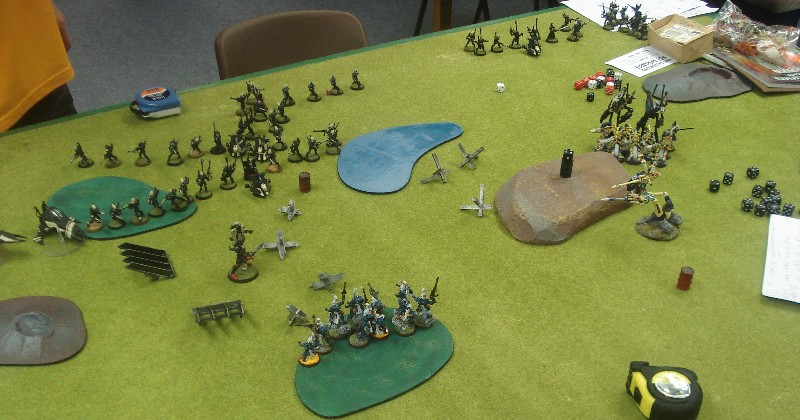
Game 4: Table 11
I was down the poorer end of the gaming hall, and was looking to
finish my day with a good massacre under my belt to compensate for
my rather humiliating wiping by Oscar's eldar in game 3.
I wasn't much encouraged
when I saw I was facing a Tau army, my previous encounters with Tau
mostly involving my IG, who suffer badly from all that 30'' photon
dakka. I'd also had a game with this Iyanden list, and also
suffered badly, being wiped out in about 4 rounds, but after that I
had realised my mistake: attacking a shooting army on a wide
frontage.
This game I was clear that I
would push forward on a small frontage and try and get to grips with
the enemy.
I was up against Jason Wolf,
a young lad with a nice looking blue Tau army. It was pretty
much the same list he'd played last year, but he had had more luck
the previous time round. His army consisted of two mobs of
kroot, an honour guard and ethereal, sniper drones, fire warriors, a
hammerhead and a bunch of broadsides and drones.
I put my snipers in the
lake, and my dark reapers and autarch on the far wing while the rest
of my army massed in the middle. I felt I had not used my
autarch well so far in the game (he was a pretty late addition to my
list - and I felt I hadn't gotten the hang of him yet) - and wanted
to do better this time round. My plan was to save him up until it
was safe for him to come out and help deal with the enemy.
Round 1
Jason got to go first, and the wraithguard suffered a hail of fire,
withstanding most of it, taking only one casualty. The kroot moved
from behind the wood to assault and the hammerhead killed another
wraithguard. In my round
everything seemed to go well. My wraithlord moved into the
wood and glanced the hammerhead, getting a great weapon destroyed
roll, which suddenly made my slog across no man's land seem so much
less arduous.
In my round my wraithguard zapped a couple of the kroot, and then
assaulted, running them down and consolidating 5'' towards the
ethereal's honour guard.
I was starting to get the
feeling that this battle was going to go my way....
Round 2
Jason hurled everything he had at my wraithguard, but with conceal
and fortune they were shrugging off a horrible amount of fire.
It was half way through this that Jason redirected his attention to
my dire avengers, who broke and fled into cover behind the wood.
In my round my wraithguard
moved forward into range of the honour guard. My farseer
mind-warred the ethereal, and fried his brain, and then the rest of
his unit assaulted the honour guard, broke them and then
consolidated into the sniper drones.
Round 3
The sniper drones lasted one turn of combat, and then my wraithguard
kept moving along his line. I decided to bring my wraithlord
out of cover and charge his kroot, while my dark reapers kept
peppering the broadside on the far table edge, intent on taking him
out before the autarch moved from cover.
In my turn my wraithlord and
banshees and harlequins all assaulted, and my wraithguard kept
moving along the line.
Of course the kroot were unable to withstand the assaulting forces
and they all consolidated on the far side of the wood, out of los of
the remaining suits.
Round 4
Oscar moved his hammerhead over to try and destroy my close combat
units with some short ranged firepower. He rolled very badly
and killed only two banshees, and with 7 wraithguard and a pair of
singing spears the brave hammerhead crew were well into the
afterlife by the end of my shooting phase.
My wraithlord took two
wounds in this round from the suits and that finished him off, but
at the same time in my round my dark reapers finally sent the far
broadside into the afterlife.
The game ended with my
farseer mind-warring the Tau commander, the wraithguard wiping out
his entourage, while a single broadside was left free, until my
autarch broke cover and wiped him out in the last round.
My only loss was my
wraithlord, (140 points) while Jason's entire army had been wiped
out (I found out at the end that Jason was only playing with 1351
points of troops). The game ended as a sound massacre to me.
I had a very pleasant chat with other players, and got some snaps of
the other games going on.
George facing another IG army, his basilisk about to go down to a
lucky ratling shot!
Some random battling, with greenskins having a good day.
Top table, game 4, with Ah Ning's Iron warriors facing up against
another chaos space marine army.
I spent some time getting
shots of the army I had finished the night before:
I was delighted to finish 9th overall, with 43 battle points, with
what was a much weaker list than I had wanted to take, and crowned
the whole day off by winning Best Army.
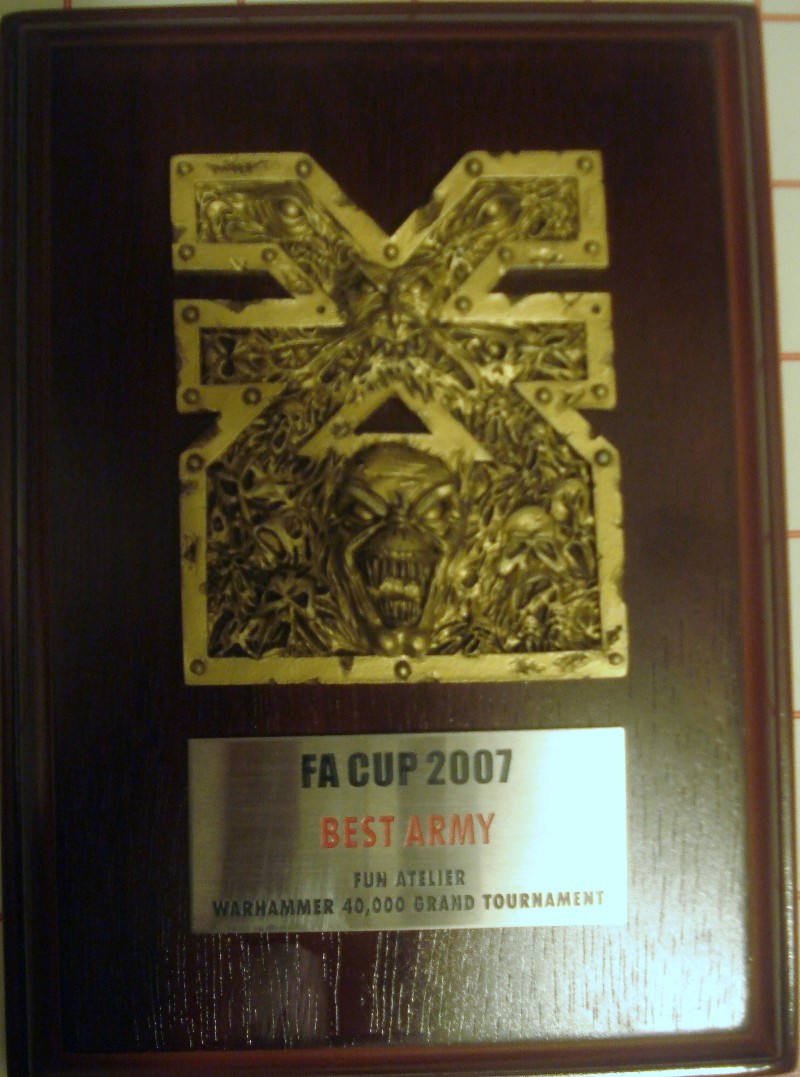
Another great event, well supported by GW's Chris Harbor, who had
come over from the UK to support the event. Thanks to all at
Fun Atelier for another excellent event, and thanks to all the
guys I played against for fun and relaxing games.
For more pics of the army:
here |